As a leading supplier of industrial feeding and discharging systems, I’ve seen firsthand how even the most robust equipment loses efficiency, safety, and lifespan when routine cleaning is overlooked. Last quarter, a customer approached us frustrated because their 2-year-old bulk material discharge hopper was clogging 3 times a week, and their feeding auger was underperforming by 20%—all because their maintenance team skipped consistent, system-specific cleaning steps. Feeding and discharging systems are the unsung workhorses of manufacturing, food processing, pharmaceuticals, and chemical production, moving everything from fine powders to large granules. But they’re also prone to material buildup, cross-contamination, and microbial growth if not cleaned correctly. Today, I’m breaking down a science-backed, supplier-approved cleaning process that’s tailored to the systems we design and service, so you can avoid costly downtime and keep your operations running smoothly. Feeding and Discharging System

First, it’s critical to clarify that not all feeding and discharging systems are created equal. The cleaning method for a pharmaceutical tablet feeding chute is worlds away from a chemical powder discharge bin for construction materials. For our part, we categorize systems into two core types to help clients align cleaning protocols with their use case: sanitary systems (for food, beverage, pharma, or nutraceuticals) and industrial systems (for bulk chemicals, construction materials, or agricultural products). Your cleaning approach will vary drastically based on this classification, so always start by verifying your system’s intended use and material handling requirements.
Step 1: Pre-Cleaning Preparation & Safety Lockout/Tagout (LOTO)
Before you touch any equipment, stop. This is non-negotiable. Feeding and discharging systems have moving parts—augers, vibratory feeders, screw conveyors—that can activate unexpectedly if not secured, leading to serious injury. For every system, start with LOTO procedures: turn off all power sources, disconnect pneumatic or hydraulic lines, lock the main power switch, and tag it with your name and date to prevent unauthorized activation. For sanitary systems, add a preliminary step to isolate the system: if you’re processing multiple materials, flush with a compatible, inert solvent to remove loose surface debris before full disassembly. For example, a bakery feeding system handling both flour and sugar will flush the chute with warm, food-grade water to remove loose flour clumps before deep cleaning, avoiding sugar buildup that can harden.
Don’t skip documentation here either. Our team always recommends creating a cleaning log that includes the date, technician name, system ID, and pre-cleaning observations (like visible buildup or unusual wear). This log helps identify recurring issues—like a persistent clog in the discharge valve—that might signal a design adjustment we can support, rather than a cleaning failure.
Step 2: Disassembly & Targeted Debris Removal
Once safety checks are complete, disassemble the system into its core components. For most systems, these are: the feed hopper, feeding auger (or screw conveyor), discharge valve, inlet/outlet chutes, and any internal liners or screens. For sanitary systems, take extra care with small parts like gaskets, filters, and seals—these are prime spots for hidden buildup that causes cross-contamination.
For dry, industrial systems (handling non-sticky materials like plastic pellets or limestone granules), start with dry disassembly cleaning first. Use stiff nylon brushes (avoid metal brushes, which can scratch liners and trap material) to scrub auger flights, hopper walls, and chute corners. For stubborn, caked-on material, use a plastic scraper—never sharp metal tools, which can gouge surfaces and create crevices where material gets trapped later. If you’re dealing with fine powder buildup that’s hard to reach, a shop vacuum with a HEPA filter is ideal; it pulls loose particles without spreading them into the work environment, which is critical for both safety and air quality.
For wet or sanitary systems (processing dairy products, fruit purees, or pharmaceutical excipients), dry removal comes first, but then you’ll follow with manual rinsing. Use warm, potable water (120°F to 140°F, per FDA guidelines for food equipment) to flush hoppers and chutes, paying close attention to gasket seams and internal crevices. For areas with persistent organic residue, a food-grade enzymatic cleaner is far more effective than harsh chemicals—it breaks down protein-based buildup (like milk fat or dough residue) without leaving a toxic aftertaste or corroding stainless steel surfaces. Our team supplies pre-vetted cleaning solutions for sanitary systems, so clients can avoid incompatible cleaners that damage equipment.
Pro tip from our service technicians: always remove augers and conveyor screws first, rather than trying to clean them in place. This gives you full access to both sides of the flights, and you can inspect for wear (like bent flights or worn bearings) while you clean—issues that would cause feeding inconsistencies if left unaddressed.
Step 3: Deep Sanitization (For Sanitary Systems Only)
If your system is classified as sanitary, cleaning isn’t enough—you need to sanitize to eliminate bacteria, mold, and pathogens, which is a legal requirement for food and pharmaceutical operations. There are two main sanitization methods we recommend, based on your system’s materials: thermal sanitization and chemical sanitization.
Thermal sanitization is the gold standard for stainless steel systems, as it leaves no residual chemicals. For feeding and discharging systems, this means using hot water (170°F or higher) circulated through the entire system for a minimum of 10 minutes, or steam cleaning for 5 minutes. For augers and hoppers, steam is ideal because it penetrates crevices that water can’t, killing 99.99% of common pathogens. Our engineers design systems with cleanout ports specifically for this, so you can connect a steam hose without disassembling major parts.
Chemical sanitization is necessary for systems that can’t withstand high temperatures, or for operations that require consistent, recordable sanitization. For food-grade systems, use a food-grade quaternary ammonium compound (quat) or hydrogen peroxide-based sanitizer, per the manufacturer’s dilution instructions. For pharmaceutical systems, use a 70% isopropyl alcohol solution, which evaporates quickly without leaving residue. Always make sure the sanitizer is compatible with your system’s materials: for example, chlorine-based cleaners can corrode aluminum, so never use them on industrial aluminum feeders.
A key mistake we see clients make is mixing cleaning and sanitizing steps. Clean first to remove all visible debris, then sanitize—buildup neutralizes sanitizers, so this order is critical. Also, always follow contact time: most sanitizers need 1 to 2 minutes of wet contact to be effective, so don’t rinse them off immediately.
Step 4: Rinse, Dry, and Reassembly
After sanitization, a final rinse is required for all systems to remove any leftover chemical residue (especially for food and pharma applications). Use the same water type as your process (potable water for food, filtered water for pharma) to avoid introducing new contaminants. For small parts like gaskets or screens, rinse individually under running water, rather than dunking them in a bucket where bacteria can grow.
Drying is an often-overlooked step that prevents microbial growth, even in sanitary systems. For open components like chutes and hoppers, air dry them completely with fans or natural ventilation. For enclosed parts like augers and conveyor screws, use lint-free microfiber cloths to wipe them dry—never leave them wet, as moisture can cause rust or mold buildup over time. Our team recommends keeping a dedicated set of cleaning cloths for each system to avoid cross-contamination between lines handling different products.
When reassembling, take the same care you did during disassembly. Replace worn gaskets and seals—old, cracked gaskets are a top source of cross-contamination in sanitary systems, and a cheap replacement prevents major downtime later. Lubricate moving parts like auger bearings according to your system’s manual, but use only lubricants approved for your application: food-grade lubricants for sanitary systems, industrial lubricants for non-sanitary systems.
Step 5: Routine Maintenance to Extend Cleaning Intervals
The best way to reduce cleaning time is to prevent buildup in the first place. As a supplier, we always work with clients to design systems with built-in cleaning features, and these same features require minimal routine upkeep. For example, our discharge hoppers feature sloped walls (60 degrees or steeper, depending on material) to prevent material from sticking, and vibratory aids that activate automatically every 4 hours to knock loose minor buildup. For auger systems, we recommend monthly inspections of flight edges and screw shafts to catch wear early, which reduces the amount of material that gets trapped during cleaning.
For routine cleaning frequency: sanitary systems (food/pharma) require daily cleaning between product runs, deep sanitization weekly, and full disassembly cleaning monthly. Industrial systems can get by with weekly cleaning for routine operations, and monthly deep cleaning for high-volume material handling. Adjust based on your material: fine powders and sticky materials (like molasses or resin) require more frequent cleaning, while non-sticky granules (like plastic pellets) can go longer.
Common Mistakes to Avoid
After 10 years as a feeding and discharging system supplier, we’ve seen these mistakes cause the most issues:
- Skipping LOTO: One client’s maintenance team forgot to lock out power, and an auger activated while they were cleaning it, resulting in a 2-month downtime and a worker’s injury. Never cut corners here.
- Using improper tools: Metal brushes and sharp scrapers scratch surfaces, creating crevices where material gets trapped. We supply approved nylon brushes and plastic scrapers to all our clients for this reason.
- Mixing cleaners: Combining bleach and ammonia creates toxic gas that can harm workers and corrode equipment. Always check compatibility before mixing.
- Forgetting small parts: Gaskets, seals, and screens are often ignored, but they’re responsible for 30% of cross-contamination incidents we’ve documented.
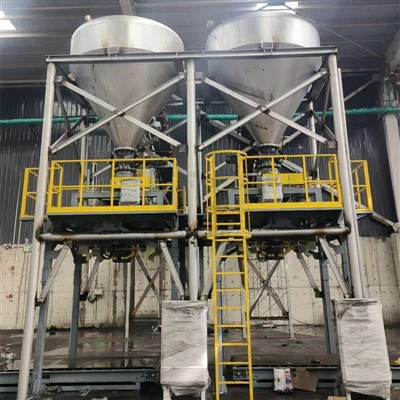
At the end of the day, a clean feeding and discharging system isn’t just a matter of compliance—it’s a matter of efficiency and safety. A well-maintained system reduces downtime by up to 40%, cuts energy costs by 15% (thanks to less friction from buildup), and eliminates the risk of product recalls due to cross-contamination. If you’re not sure your current cleaning protocol is aligned with your system’s design, or you’re looking to upgrade your feeding and discharging equipment to make cleaning easier, our team is here to help. Contact our sales team to discuss your operation, get a custom cleaning plan, or learn more about the systems we build with easy-clean features.
Drying Equipment References
- FDA. (2022). Food Equipment Sanitation Guidelines for Processing Facilities. U.S. Food and Drug Administration.
- Occupational Safety and Health Administration (OSHA). (2021). Lockout/Tagout Standard (29 CFR 1910.147). U.S. Department of Labor.
- American Society of Agricultural and Biological Engineers (ASABE). (2020). Standards for Cleaning and Sanitation of Bulk Material Handling Equipment. ASABE.
- International Organization for Standardization (ISO). (2019). ISO 14155: Sanitary Equipment Design Guidelines for Food and Beverage Industry. International Organization for Standardization.
Jiangsu Haike Environmental Tech Co., Ltd.
As one of the most professional feeding and discharging system manufacturers and suppliers in China, we’re featured by quality products and good service. Please rest assured to wholesale customized feeding and discharging system at competitive price from our factory. Contact us for quotation.
Address: No.1, Wei’er Branch Road, Shanggang Industrial Park, Jianhu County, Yancheng City, Jiangsu Province, China
E-mail: 17388487000@163.com
WebSite: https://www.jshkhbwm.com/
