When I first started out as a rubber bumper supplier 12 years ago, I didn’t just sell parts—I sold solutions. Back then, I’d get calls from maintenance teams and plant managers panicking because their rubber bumpers were cracking, compressing too quickly, or falling apart in as little as six months. I’d spend hours walking them through troubleshooting, only to realize most of the issues weren’t from bad parts (though sure, we’ve all had a bad batch slip through quality control). Most of the time, it was a simple lack of consistent maintenance. Over the years, I’ve compiled a step-by-step guide that’s worked for every client, from small warehouse operations to heavy construction companies, and I’m sharing it here today. Let’s dive into how to actually maintain rubber bumpers so you don’t have to replace them every quarter. Rubber Bumper
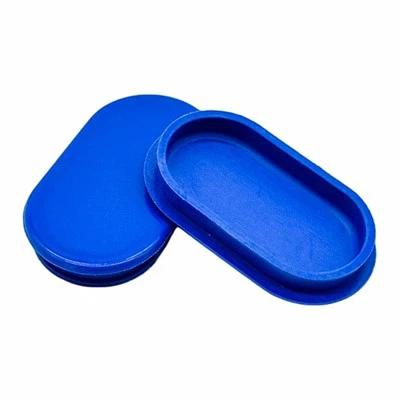
First, let’s get on the same page about what rubber bumpers do and why maintenance matters. They’re those unsung heroes of industrial machinery, vehicle gates, loading docks, and even heavy equipment cabs. Their whole job is to absorb impact, right? Whether it’s a forklift slamming into a loading dock edge, a trailer coupling with a truck, or a conveyor belt jarring against a frame, rubber bumpers take the brunt of that force. But rubber is a living material—even the highest-grade EPDM, neoprene, or natural rubber compounds we use don’t last forever, especially when exposed to harsh conditions. Skip consistent maintenance, and you’ll end up with bumpers that don’t absorb impact anymore, leading to damaged equipment, safety hazards, and way more downtime than replacing a set of bumpers would cost. I’ve seen a single dock accident delay a shipment for three days because a rotted bumper failed to stop a trailer, costing a company thousands in missed deadlines. That’s why this isn’t just “cleaning a part”—it’s protecting your bottom line and keeping your team safe.
Let’s start with the basics: inspection, and it’s not just a quick once-over. I tell every client to do two types of inspections: daily visual checks and a more thorough monthly deep dive. The daily check is fast—when you start your shift, walk past the loading docks or machinery where bumpers are installed and look for obvious red flags. Cracks, chunks missing, bumpers shifted out of place, or areas where rubber is peeling away from the mounting surface. For example, if you have a series of dock bumpers, run your hand along the surface as you walk—if it feels sticky or tacky instead of firm and slightly pliable, that’s a sign it’s breaking down. The monthly inspection is where you get detailed, because small issues turn into big ones fast. Grab a flashlight, a small screwdriver, and a tape measure. Check for compression set first—this is when rubber stays indented after impact, instead of springing back. Press down on different areas of the bumper; if the indent stays for more than 3 seconds, that’s a clear sign of age or overexertion. Next, check the mounting hardware. Bumpers aren’t much good if they’re bolted crooked or loose; a loose bumper can shift during impact and become a flying hazard or not absorb force at all. Also, look for signs of chemical exposure—if you work around solvents, oils, or harsh cleaning products, those can eat through rubber from the inside out, even if the surface looks fine. I once had a mining client who thought their bumpers were good for a year, but a monthly check revealed they were breaking down from exposure to hydraulic mist that had been accumulating near their conveyor system. Catching that early saved them from replacing 40 bumpers ahead of schedule.
Now, cleaning—this is where most people go wrong, because they either clean too rarely or use the wrong products. Let’s be clear: rubber isn’t indestructible, and harsh cleaners will do more harm than good. The frequency of cleaning depends entirely on your environment. If you’re in a dry, climate-controlled warehouse with no exposure to dirt or chemicals, a quarterly wipe-down is enough. But if you’re outdoors, in a manufacturing plant, or around heavy dust, chemicals, or road salt, you need to clean them every month, right before that monthly inspection. Here’s the right way to do it: start with a gentle solution. Mild dish soap mixed with warm water works for most cases—nothing stronger, no bleach, no ammonia-based cleaners, no solvent-based degreasers. Those will break down the rubber’s molecular structure, making it crack or degrade faster. If you have a bumper covered in heavy oil or grease (common in automotive repair shops or factories), use a pH-neutral industrial rubber cleaner, not a regular degreaser. Apply the solution with a soft-bristled brush or a microfiber cloth—never a stiff wire brush, which will scratch the rubber and create tiny weak points where cracks start. Scrub gently in circular motions, paying extra attention to gaps and the areas near the mounting bolts. Once you’ve scrubbed, rinse thoroughly with clean water to remove all soap residue—leftover soap can attract dirt and moisture, which speeds up deterioration. For outdoor bumpers that are exposed to UV rays, you can add a step here: once they’re fully dry, apply a thin layer of rubber protectant specifically made for EPDM or neoprene (depending on your bumper compound, of course). This will block UV rays, which are one of the biggest enemies of outdoor rubber. I recommend oil-based protectants, not water-based ones, because they last longer in extreme heat or cold.
Next, protecting rubber bumpers from environmental stressors. This is the part that keeps them from failing prematurely, not just cleaning and inspecting after the fact. Let’s break down the biggest stressors and how to mitigate each one. First, UV exposure—if your bumpers are installed outdoors, whether on loading docks, trailer hitches, or outdoor equipment, UV radiation from the sun breaks down rubber’s polymer chains, causing it to become brittle, crack, and lose elasticity. The best fix here is choosing a UV-stabilized rubber compound when you order your bumpers—all of our standard outdoor bumpers have UV stabilizers added during manufacturing, but that only goes so far. Applying that rubber protectant I mentioned earlier every six months adds an extra layer of defense. If you have bumpers on equipment that’s stored outside when not in use, use a heavy-duty rubber cover to shield them from direct sun.
Second, chemical exposure. If you work with oils, hydraulic fluids, solvents, or cleaning chemicals, these can cause rubber to swell, soften, or harden, depending on the chemical and the rubber type. For example, natural rubber is great for general impact but breaks down quickly when exposed to petroleum-based oils. That’s why we offer different rubber compounds for different applications: EPDM for outdoor use and water exposure, neoprene for oil resistance, silicone for extreme temperatures, and so on. But even if you have the right compound, you can minimize exposure by installing barriers if possible, like plastic sheeting or rubber mats near bumpers that are in high-chemical areas, and wiping up chemical spills immediately if they get on a bumper. I had a restaurant supply client who installed neoprene bumpers on their delivery dock, but they were spilling cleaning solutions on them every day. By adding a small rubber splash guard above the bumpers and wiping them down right after spills, their bumper lifespan doubled from 8 months to 16 months.
Third, extreme temperatures. Rubber performs differently in hot and cold. In freezing temperatures, rubber becomes rigid and brittle, so it’s more prone to cracking during impact. In extreme heat, rubber softens, compresses permanently, and loses its ability to absorb force. The fix here is, again, choosing the right compound for your climate: silicone works best for temperatures between -100°F and 500°F, neoprene for -40°F to 220°F, EPDM for -60°F to 300°F. But you can add maintenance steps: in cold climates, make sure your bumpers are kept free of ice and snow, which adds extra weight and makes impact harsher. A quick scrape of snow after every storm prevents that. In hot climates, avoid parking heavy equipment in direct sun for long periods, if possible, or use sun shields for movable bumpers.
Then there’s handling minor repairs—wait, can you actually repair rubber bumpers instead of replacing them? For small damage, yes, but only if it’s caught early. If you have a tiny crack (less than ¼ inch) on the surface, you can use a rubber repair kit made for industrial rubber. Clean the area thoroughly with isopropyl alcohol, sand the crack gently to create a rough surface for the adhesive to stick, apply the rubber filler, and let it cure for the recommended time (usually 24 hours) before exposing it to impact. But if the crack is deeper than ¼ inch, if there’s a chunk missing, or if you see compression set or mounting issues, don’t try to repair it. I see this all the time—people patch a bumper that’s already failing, and it fails completely a month later, leading to more expensive damage. When in doubt, replace it. It’s cheaper than risking equipment downtime or safety incidents.
Let me also address common mistakes I see clients make, because avoiding these small missteps will save you a lot of trouble. First, overloading bumpers. Every bumper has a weight or impact rating, based on its size and compound. You can’t expect a small 4×4 inch bumper to absorb the impact of a 10,000 lb forklift— that’s a surefire way to get compression set and early failure. When you order bumpers, tell your supplier how much force they need to absorb, not just what size you think you need. Second, not aligning bumpers correctly. If a bumper is mounted at an angle, the impact force isn’t distributed evenly across the surface, so one side takes all the stress and cracks first. Take the time to align them straight, use a level when mounting, and recheck alignment every few months, especially after heavy use. Third, storing bumpers wrong when they’re not in use. If you have spare bumpers, don’t stack them heavy on top of each other, don’t leave them in direct sun, and don’t store them near chemicals. Store them in a cool, dry place, laid flat, so they don’t get compressed permanently while waiting to be installed.
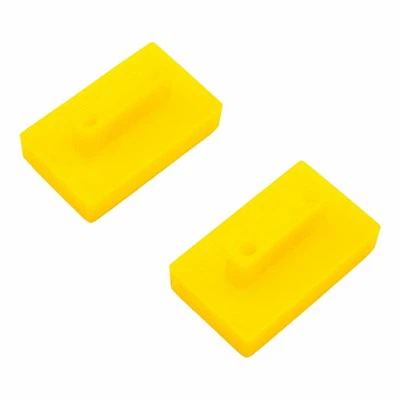
I’ve been in this business long enough to know that a good bumper isn’t just about the part you buy—it’s about maintaining that part so it works for years. I’ve had clients who’ve had their original bumpers from us for 7 years, still going strong, because they followed a consistent maintenance routine, versus clients who cut corners and replace bumpers every 6 months. At the end of the day, the goal of maintenance is simple: keep your bumpers doing their job, protect your equipment, and save you money. If you’re not sure if your current maintenance routine is enough, or you need help choosing the right bumper compound for your specific conditions, don’t hesitate to reach out to our team. We don’t just sell bumpers—we offer free guidance on maintenance tailored to your application, so you don’t have to guess. Whether you’re a small shop with a couple of dock bumpers or a large plant with hundreds, we’re here to help you get the longest lifespan out of your rubber bumpers without overcomplicating things.
Rubber Gasket References
- International Organization for Standardization. (2019). Rubber Products for Industrial Applications: Maintenance and Performance Guidelines. ISO 11345:2019.
- American Society for Testing and Materials. (2021). Standard Practice for Maintenance of Elastomeric Components in Industrial Equipment. ASTM D412-21.
- Rubber Manufacturers Association. (2022). Field Maintenance Guide for Industrial Rubber Products. RMA Publication No. 123.
- Occupational Safety and Health Administration. (2020). Safety Guidelines for Material Handling Equipment Impact Protection. OSHA 3347-09R.
Haining Chaoyue Seals Co., Ltd.
Address: Building 9, 158 Lianhong Road, Yuanhua Town, Jiaxing, Zhejiang, China.
E-mail: chaoyue@cyseals.com
WebSite: https://www.hncyseal.com/
